These Cream Puff's were so light and airy and DELICIOUS!
In a medium sauce pan (I use my non-stick 2 quarter) melt the Butter or Marg., add the water and bring to a boil.
Add the Flour and Salt all at once and STIR VIGOROUSLY! -- hardest part of the whole recipe!!!
continue cooking and stirring until the mixture is all combined and forms a nice ball that doesn't separate. Add Eggs 1 at a time, using a wooden spoon mix well after each one for about 1 or 2 minutes until smooth.
You can drop the batter by teaspoonfuls onto a greased baking sheet or put the batter in a large decorator or pastry bag or a gallon sized zippered freezer bag. **HINT, don't use a regular storage bag - they will blow out on you, they're just not strong enough for this kind of batter. Squeeze all the air out you can before closing the bag, snip about a 1 inch cut off a bottom corner and "pipe" the batter onto the cookie sheet. The size and shape is up to you, I like to do about a doughnut hole size of batter. I prefer to make desserts like this in about a 2 or 3 max bite size for parties and potlucks, that way you don't feel so guilty having several different things when they're only a few bites each. I also think it would be really pretty to fit your bag with a large STAR decorator tip to pipe the batter out, just would give a little fancier look to them. Thinking I'll try this next time I make them.
If there are any little "peaks" of dough or they are not as rounded as you would like, just dip your finger in a little water and pat the dough into shape.
Bake in a pre-heated 400 degree oven for about 20 to 25 minutes, longer if making larger shapes. Just watch the first batch close so you'll be able to do the next with ease.
After baking, remove to parchment paper and let cool. When completely cool, carefully pull off a little top or cap and set aside, if there's extra dough, just pinch it out. Generally these come out very airy with a nice little cavity to hold the filling, but sometimes there is more dough than I want, so I just pinch it out.
Whip the Cream Cheese till light and smooth, add the Whipping Cream and continue whipping for about 3 minutes - will fluff up a little bit and add some volume.
While the Cream Cheese mixture is whipping combine 1/4 C Boiling Water to the .3 oz package of Jello, stirring until all the Jello is dissolved.
With the mixer on LOW speed start pouring in the Jello, use a spoon to get it all out from the bowl, continue mixing until combined well, making sure to use a spatula to scrape down the sides and bottom.
Add your freshly zested Lemon Zest or Jam if doing the Raspberry flavor Mouse, mix it in well.
Almost done, next use a spatula or wooden spoon FOLD in your thawed 8 oz container of Whipped Topping.
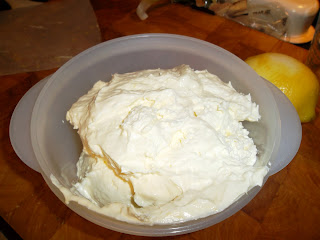
Look at how light and fluffy the filling is! If you want a more intense color add a few drops of food coloring before you fold in the Whipped Topping. Between the Cream Cheese and the Whipped Topping the color of the Jello lightens up considerably.
Fill a pastry bag or gallon sized zippered freezer bag and pipe in the filling into each little Puff, filling just a little above the rim of the Puff.
Put their little tops back on.......................
After all the Cream Puffs were filled I drizzled them with some Chocolate Sauce I made from melting some Semi-sweet chocolate wafers (can use chips too) in a little bit of the warmed Whipping Cream, stirring till all were melted and mixture was smooth. **HINT, the sauce was good but next time (which is how I usually do it) I will just melt some chocolate and thin it with some Shortening and use it for the drizzle. I like how it "sets" back up or hardens better. It's not as messy to eat and I think the shiny threads of chocolate are so pretty and very decadent looking. Then just refrigerate until ready to serve.
I hope you enjoy this dessert as much as my family and I did.


No comments:
Post a Comment