Tis the season to be crafting, fa la la la la la la la and the crafting has begun! Here's an easy, low cost, low
ingredient and wonderful smelling Christmas ornament that's as easy to make as it is great smelling!
I first made these Cinnamon ornaments years ago and I have made them several times since. I've sold them at craft shows, tucked them in baskets of Pinecones around the house (their cinnamon scent last quite a while) and given them away as gifts. This design has a natural kind of "Rustic" look to them and would lend themselves to any shape of cookie cutter. A moose or bear design would look great in a "lodge" themed Christmas design.
To make these wonderful smelling Christmas ornaments you will need:
about 3/4 of a Cup of Ground Cinnamon
1/4 to 1/3 cup of plain Applesauce
a medium sized mixing bowl, wooden spoon, rolling pin, cookie cutters of your choice, thin spatula, baking sheet, a drinking straw, ribbon or raffia and white paint, glitter paint or snow writer paint.

In the medium mixing bowl combine 1/2 cup of the Cinnamon and 1/4 cup of Applesauce to start with,
stir to mix well. If mixture is too dry add more applesauce - if to wet add more cinnamon -- a little at a time of either, stirring well after each or any additions.
Continue stirring until a ball of dough forms. Sprinkle additional Cinnamon onto a cutting board or counter and then knead ball of dough several times, adding more cinnamon as needed till dough ball is no longer sticky.
Next using a rolling pin, roll out dough to about 1/4 inch thickness. You may need to sprinkle a little more cinnamon on to keep the dough from sticking to the surface or the rolling pin.
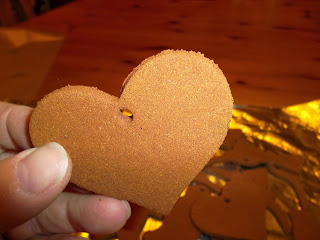
Once rolled out to the desired thickness it's time to start cutting out your chosen shapes! I love the metal cookie cutters, their thin cutting surface really makes getting nice crisp edges easy but any style would work - use what you have. As the Applesauce does have some fiber to it, you want to make sure you press the cookie cutter down firmly and evenly.
Before moving the cut outs to a baking sheet you'll want to use the drinking straw to punch a hole for the ribbon or raffia to be tied through. **TIP -- I out of habit usually blow out the little piece that gets stuck in the straw, I just blow it back onto the excess dough and mix it back into the ball.
Using a thin spatula or knife lift the cut shape off the board and transfer to a foil lined baking sheet.
Now that all shapes have been cut out, hanger holes punched and they've been placed on the foil lined baking sheet it's time to bake them off! Actually you're really doing more of a drying than baking. You're going to place the baking sheet of cutouts into a pre-heated 200 degree F oven for about 2 hours. They really won't get browned but if you gently pick one up you can see that the outer edges are becoming dried and the center area looks moist. They will continue to dry a bit more as they cool down. When I remove them from the oven I leave them on the baking sheet to cool down. If you had a dehydrator you could use it to dry them instead of the oven. But then your house wouldn't smell as wonderful! As the cut outs bake-off in the oven, the oils of the cinnamon heat up and the scent of the cinnamon permeates your home making it smell soooo wonderful.

After the cut outs have cooled completely, you may need to "sand" the edges a bit - if you want a smoother finish. To do this simply use a piece of sand paper or a nail file -- nail files work awesome! Their straight edge make it easy to get into any corners your cut out design may have and if you have any arthritis or hand issues I think the file is easier to grip.
Once all of the cut outs have had their edges filed it's time to decorate them!!!
For this batch I chose a Snow Glitter writer that I had. It has a nice writing tip on it but it was more translucent than I really preferred.
Last time I made the cut outs I used a white paint pen, it was much more opaque but not sparkly enough so on the snowflakes I added some glue and sprinkled it with a fine glitter. They almost had a flocked look to them, they were very pretty hanging on a tree.
But for this time I just simply wrote a message did simple dots or an outline and let the glitter paint dry.
Once the paint has completely dried it's time to put some ribbon or raffia, yarn or whatever you choose on to help them hang from your tree, packages or garland or whatever you're going to do with them. If you don't plan on hanging them then don't use the straw to put a hole in them.
Now see wasn't that a simple project??? And oh the wonderful scent that it leaves your house in just wonderful. I hope you give these simple ornaments a try and let me know what you think.
Happy Holidays, Tracy


I still have huge jars of cinnamon I bought at one of those discount stores maany years ago when I made them with the kids. I use the cinnamon for these and to boil to make the house smell good.
ReplyDelete